Search
Close this search box.

Amigurumilandia PATTERNS

Free patterns for all tastes

Dolly Kitty Crochet Pattern Free

May 11th, 2024

Dolly Kitty Crochet Pattern Free

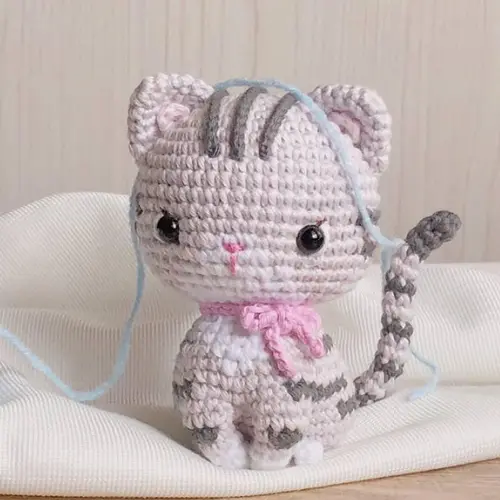
Welcome to the enchanting realm of amigurumi! Indulge in the delightful art of crochet with our complimentary Kitty Crochet Pattern Free, featuring the lovable Dolly the kitty, meticulously crafted to capture your heart! (Artistry by: @littlehand_crochet). Standing at a charming 9cm, this feline masterpiece is tailor-made for crochet enthusiasts seeking a whimsical project to immerse themselves in. Dolly exudes an irresistible charm with her delicate white fur accentuated by subtle grey stripes, elegantly complemented by a darling pink scarf. But Dolly is more than just a pretty face—cats, with their grace and agility, have enchanted humans for generations. They embody a unique blend of independence and affection, forming deep bonds with their human companions while retaining a sense of mystery and allure.
In popular culture, cats have carved out a special place, from the lasagna-devouring Garfield to the mischievous Salem Saberhagen. Our complimentary crochet pattern pays homage to these iconic felines, infusing your crafting endeavors with a dash of feline charm. Crafted with care, Dolly transcends the realm of mere toy, becoming a cherished gift for cat aficionados and crochet enthusiasts alike.

Embark on your crochet odyssey today with our complimentary pattern, and watch as Dolly springs to life, bringing joy and whimsy to your world. With each stitch, you’ll find yourself drawn deeper into the enchanting world of amigurumi, where creativity knows no bounds. So why wait? Grab your hooks and yarn, and let the magic of Dolly and our Kitty Crochet Pattern Free inspire your next crochet adventure!

With our step-by-step free pattern in English, you can easily create your own Barbie amigurumi. Our instructions will guide you from the first stitches to the final details of her outfit and hat, ensuring that every part of your Cowboy Barbie is perfectly crocheted. Additionally, we offer tips on how to crochet Barbie’s clothes, allowing you to customize her outfit and add a unique touch.
In summary, if you are looking for a crochet project that combines creativity with the nostalgia of a classic doll, our Cowboy Barbie is the perfect choice. Download our free pattern and dive into the wonderful world of Barbie amigurumi. Don’t wait any longer to create your own crocheted Barbie and add a special touch to your doll collection!

If you prefer, you can optionally acquire the ad-free, printable PDF version of this pattern, which includes additional support and helps us continue creating more wonderful patterns. Your purchase supports Amigurumilandia, ensuring we can keep providing high-quality crochet patterns for enthusiasts around the world. For more information and to find the PDF version, please click here 👈
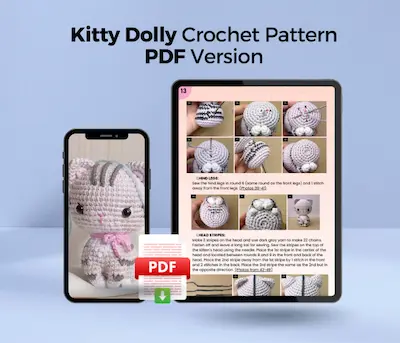
¡Let's get started!

Marterials
  • Yarn (fingering weight cotton yarn) in the following colors: White, Light Pink, Pink, Light Grey, and Dark Grey
  • Crochet hook size 2.25 mm and 2.5 mm.
  • Pink and dark brown embroidery thread
  • 7 mm safety eyes, two black half beads
  • Polyester fiberfill
  • Pink blush
  • Scissors, glue, soft wire, sewing needle
Abbreviations

Rnd: Round
St: Stitch
Ch: Chain
Sl st: Slip stitch
Sc: Single crochet
Inc: Increase
Dec: Decrease
Hdc: Half double crochet
Dc: Double crochet
(…)xN: Repeat (…) N times

What you need to know about this pattern:
  • The approximate size of Dolly, the little gray tabby kitten, is about 3.5 inches / 9 cm (depending on the yarn and crochet hook you use).
  • All pattern parts are crocheted in continuous rounds. You should place a stitch marker in the last stitch of each round or use a different colored yarn instead.
  • Crochet each stitch tightly to avoid small holes.
  • Use an ‘invisible decrease’ instead of a ‘regular decrease’ to make your doll look neater.
  • Fill the head and body firmly; the kitten will be cute and chubby

Tips for crocheting Amigurumis 😉

  1. 🧵 Choose Quality Materials: The quality of your materials directly impacts the final result. Opt for soft and durable yarns, and needles that suit your knitting style. Remember, your amigurumis deserve the best!
  2. 📏 Know Your Gauge: Before diving into the project, take time to understand your knitting tension. Making a small test square will help you adjust the size and achieve a perfect amigurumi.
  3. 📖 Dive into the Pattern: Before you start knitting, carefully read through the entire pattern. Familiarize yourself with each step and make sure you understand all the instructions. This prior knowledge will make you feel more confident during the process.
  4. 📍 Use Stitch Markers: Marking the beginning of each round with a stitch marker is key. This not only helps you follow the pattern more easily but also prevents errors and confusion.
  5. 🌈 Explore with Colors: The color palette is your canvas! Don’t be afraid to experiment and play with unexpected combinations. Colorful amigurumis are more fun and expressive.
  6. 🧼 Block Your Creations with Care: After completing your amigurumi, blocking is essential. This process smooths out the details and defines the shape, giving a professional touch to your creations. Remember, crochet is more than a hobby; it’s an art form. Enjoy every stitch and create magic with your own hands! 💖✨ Happy knitting! 🌸🌟
Head

With a 2.5mm crochet hook
Start with light gray yarn.
Rnd 1: Make a magic ring of 6 sc (6)
Rnd 2: 2 sc in each st around (12)
Rnd 3: (1 sc, inc) x 6 (18)
Rnd 4: 1 sc, inc, (2 sc, inc) x 5, 1 sc (24)
Rnd 5: (3 sc, inc) x 6 (30)
Rnd 6: 2 sc, inc, (4 sc, inc) x 5, 2 sc (36)
Rnd 7: (5 sc, inc) x 6 (42)
Rnd 8: 3 sc, inc, (6 sc, inc) x 5, 3 sc (48)
Rnd 9-11: (3 rounds): 1 sc in each st around (48)
Rnd 12: 5 sc, (dark gray) 7 sc, (light gray) 17 sc, (dark gray) 7 sc, (light gray), 12 sc (48)
Rnd 13: (Light gray) 1 sc in each st around (48)
Rnd 14: (Light gray) 5 sc, (dark gray) 6 sc, (light gray) 8 sc, (white) 3 sc, (light gray) 8 sc, (dark gray) 6 sc, (light gray) 12 sc (48)
Rnd 15: (Light gray) 18 sc, (white) 5 sc, (light gray) 25 sc (48)
Rnd 16: (Light gray) (6 sc, dec) x 2, 1 sc, (white) 5 sc, dec, 1 sc, (light gray) 5 sc, dec, (6 sc, dec) x 2 (42)
Rnd 17: (Light gray) (5 sc, dec) x 2, (white) 5 sc, dec, 2 sc, (light gray) 3 sc, dec, (5 sc, dec) x 2 (36)
Rnd 18: (Light gray) (4 sc, dec) x 2, (white) 4 sc, dec, 3 sc, (light gray) 1 sc, dec, (4 sc, dec) x 2 (30)
Rnd 19: (Light gray) (3 sc, dec) x 2, (white) 3 sc, dec, 3 sc, (light gray) dec, (3 sc, dec) x 2 (24)
Stuff the head firmly with fiberfill.

Rnd 20: (Light gray) (2 sc, dec) x 2, (white) (2 sc, dec) x 2, (light gray) (2 sc, dec) x 2 (18)
Rnd 21: (Light gray) (1 sc, dec) x 2, (white) (1 sc, dec) x 2, 1 sc, (light gray) dec, 1 sc, dec (12)
Rnd 22: (Light gray) dec x 6 (6)
Finish stuffing the head firmly. Fasten off and leave a long tail for sewing. Using a yarn needle, pass the tail through the front loop of each remaining st and tighten to close. (see approximate head size below)

Image 1

The horizontal circumference is 18.5 cm.
The vertical circumference is 18 cm.
(If you use the same yarn weight and crochet hook size that I recommend)

Ears (make 2)

With a 2.5mm crochet hook
Make 2 ears, start with light gray yarn.
Rnd 1: Make a magic ring of 6 sc (6)
Rnd 2: (1 sc, inc) x 3 (9)
Rnd 3: 1 sc, inc, (2 sc, inc) x 2, 1 sc (12)
Rnd 4: (3 sc, inc) x 3 (15)
Rnd 5: 2 sc, inc, (4 sc, inc) x 2, 2 sc (18)
Fasten off and leave a long tail for sewing

Inner Ears

With a 2.5mm crochet hook
Make 2 inner ears and use light pink yarn to make 2 chains.
Rnd 1: Begin in the second chain from the hook, then crochet [(1 sc, 1 hdc, 1 sc) in the same stitch] (3)
Fasten off and hide the yarn end.

Image 2
Hind Legs

With a 2.5mm crochet hook
Make 2 hind legs and use white yarn to make 2 chains.
Rnd 1: Begin in the second chain from the hook, then crochet [(1 sc, 2 dc, 1 sc) in the same stitch] (4)
Fasten off and leave a long tail for sewing.
Using a yarn needle, pass the tail through the front loop of each remaining stitch and tighten to close.

Front Legs

With a 2.25mm crochet hook
RIGHT LEG
Start with white yarn
Rnd 1: Make a magic ring of 4 sc (4)
Rnd 2: (1 sc, inc) x 2 (6)
Rnd 3: Inc, 2 sc, (light gray) 3 sc (7)
Rnd 4: (Light gray) inc, dec, 4 sc (7)
Rnd 5: (Dark gray) inc, 3 sc, (light gray) 3 sc (8)
Rnd 6: (Light gray) inc, 7 sc (9)
Fasten off and leave a long tail for sewing

LEFT LEG
Start with white yarn
Rnd 1: Make a magic ring of 4 sc (4)
Rnd 2: (1 sc, inc) x 2 (6)
Rnd 3: Inc, 2 sc, (light gray) 3 sc (7)
Rnd 4: (Light gray) inc, dec, 2 sc, (dark gray) 2 sc (7)
Rnd 5: (Dark gray) Inc, 1 sc, (light gray) 5 sc (8)
Rnd 6: (Light gray) inc, 7 sc (9)
Fasten off and leave a long tail for sewing

Image 3
Body

With a 2.25mm crochet hook
Start with light gray yarn.
Rnd 1: Make a magic ring of 6 sc (6)
Rnd 2: 6 inc (12)
Rnd 3: (1 sc, inc) x 6 (18)
Rnd 4: 1 sc, inc, (2 sc, inc) x 5, 1 sc (24)
Rnd 5: (3 sc, inc) x 6 (30)
Rnd 6: 2 sc, inc, (4 sc, inc) x 5, 2 sc (36)
Rnd 7: 35 sc, (dark gray) 1 sc (36)
Rnd 8: (Dark gray) 11 sc, (light gray) 12 sc, (dark gray) 12 sc, (light gray) 1 sc (36)
Attach both hind legs to the body.

Rnd 9: (Light gray) 1 sc, (dec, 5 sc) x 2, (left leg) 7 sc, (skip last 2 sts on left leg), (skip 2 sts on body), (body) 1 sc, (right leg) 7 sc, (skip last 2 sts on right leg), (skip 2 sts on body), (5 sc, dec) x 2, 1 sc, (dark gray) 1 sc (42) (1st and 2nd image from below)
Rnd 10: (Dark gray) 5 sc, (light gray) dec, 1 sc, (dark gray) 4 sc, dec, 2 sc, (light gray) 3 sc, dec, 3 sc, (dark gray) 2 sc, dec, 4 sc, (light gray) 1 sc, dec, (dark gray) 5 sc, dec (36)
Rnd 11: (Light gray) 1 sc in each st around (36)
Rnd 12: (Light gray) (4 sc, dec) x 2, 4 sc, (white) dec, 1 sc, (light gray) 3 sc, dec, (4 sc, dec) x 2 (30)
Lightly stuff both hind legs with fiberfill.

Rnd 13: (Dark gray) 10 sc, (light gray) 3 sc, (white) 4 sc, (light gray) 3 sc, (dark gray) 10 sc (30)
Rnd 14: (Light gray) (3 sc, dec) x 2, 2 sc, (white) 1 sc, dec, 3 sc, (light gray) dec, (3 sc, dec) x 2 (24)
Rnd 15: (Dark gray) 7 sc, (light gray) 2 sc, (white) 7 sc, (light gray) 2 sc, (dark gray) 6 sc (24)
Rnd 16: (Light gray) (2 sc, dec) x 2, (white) (2 sc, dec) x 2, 1 sc, (light gray) 1 sc, dec, 2 sc, dec (18)
Finish stuffing the body firmly. Fasten off and leave a long tail for sewing. Sew the remaining yarn under the front legs to close the gap between the leg and the body. (3rd image from below). Sew both front legs onto the body in round 6 and snugly adjust them together. (From the 4th to the 8th image in the box below).

Image 4
Tail

With a 2.25mm crochet hook
Start with dark gray yarn.
Rnd 1: Make a magic ring of 6 sc (6)
Rnd 2-4: (3 rounds): 6 sc (6)
Rnd 5-6: (2 rounds): (Light gray) 6 sc (6)
Rnd 7: (Dark gray) 6 sc (6)
Rnd 8-9: (2 rounds): (Light gray) 6 sc (6)
Rnd 10: (Dark gray) 6 sc (6)
Rnd 11-12: (2 rounds): (Light gray) 6 sc (6)
Rnd 13: (Dark gray) 6 sc (6)
Rnd 14-15: (2 rounds): (Light gray) 6 sc (6)
Rnd 16: (Dark gray) 6 sc (6)
Rnd 17-18: (2 rounds): (Light gray) 6 sc (6)
Rnd 19: (Dark gray) 6 sc (6)
Rnd 20-21: (2 rounds): (Light gray) 6 sc (6)
Rnd 22: (Dark gray) 6 sc (6)
Fasten off and leave a long tail for sewing.

Image 5
Assembling and Embroidering

FACE
-Eyes: Mark points A, B, C, D (Box 1) and thread a needle with light gray yarn and insert it from under the chin, pull out at [A] (Box 2), push the needle backward at [B] and pull out at [C] (Box 3), push the needle again at [D] and pull out at the starting point. (Box 4) Pull the yarn tightly to create the eye socket and make a knot.
The space between the two eyes is 9 stitches.

Image 6

-Eyelashes: Thread a needle with dark brown yarn and insert it from under the chin, pull out at [E], push the needle backward at [F] and pull out at [G], push the needle again at [H] and pull out at the starting point. (Image 7)

Image 7

-White Eyes: Place 7mm eye beads in the eye socket and sew the white part of the eyes with white yarn. (Image 8)

Image 8

-Nose: Sew the nose with pink yarn between rounds 14 and 15 (same level as the bottom line of the eyes) and 4 stitches away from each eye. Embroider the nose approximately 5 times using a horizontal line. Additionally, make a vertical line from the center of the nose 2 rounds down.
-Ears: Sew the ears on rounds 4 to 9 (6 rounds) and 5 stitches away from the eyes. (Box 1,2 and 3)
-Inner Ears: Glue the inner ears on rounds 4 and 5 of each ear.
Carefully sew the head onto the body.

Image 9

BODY: Make the bottom indentation for easier standing. Thread a needle with light gray yarn and insert it from the back of the body, pull out at [A], push the needle backward at [B] and pull out at [C], push the needle again at [B] and pull out at the starting point. Pull the yarn tightly to make the indentation at the bottom and make a knot. (Image 10)

Image 10

HIND LEGS: Sew the hind legs in round 6 (same round as the front legs) and 1 stitch away from the front legs. (Image 11)

Image 11

HEAD STRIPES: Make 3 stripes on the head and use dark gray yarn to make 22 chains. Fasten off and leave a long tail for sewing. Sew the stripes on the top of the kitten’s head using the needle. Place the 1st stripe in the center of the head and located between rounds 8 and 9 in the front and back of the head. Place the 2nd stripe away from the 1st stripe by 1 stitch in the front and 2 stitches in the back. Place the 3rd stripe the same as the 2nd but in the opposite direction. (Image 12)

Image 12

BODY STRIPE: Use dark gray yarn to make 12 chains. Fasten off and leave a long tail for sewing. Place the stripe along the red dashed line between rounds 6 and 16.

HOW TO MAKE A BOW FOR THE RIBBON:

  • Use pink yarn to make 65 chains.
  • Wrap a ribbon around Dolly’s neck. Let the left ribbon be longer than the right.
  • Cross the left ribbon over the right.
  • Bring the left ribbon under the right in the center. Pull the left ribbon through and set it aside.
  • Make a loop with the right ribbon. (now it should be on your left side)
  • Twist the loop to the right.
  • Pick up the unknotted ribbon (left ribbon) and place it over the knotted ribbon.
  • Fold it back over the knotted loop to make the “half loop”.
  • Roll it forward again over the knotted loop to finish the “half loop”.
  • Make a loop with the left ribbon.
  • Pass the loop of the left ribbon through the “half loop”.
  • Pull the knotted ends to form the bow and adjust the ribbons as needed. (You can refer to the images below)
Image 13

TAIL: Fold the ends of the soft wire and glue it. Insert the soft wire into the tail and cut the excess wire. Sew the tail in round 5 of the body and bend it into an ‘S’ shape curve.

Image 14

CHEEKS: Apply pink blush to both cheeks.

Congratulations! You did it! The Kitty pattern is complete. Thank you for your support! I hope you enjoyed crafting the Amigurumilandia's patterns.

Support us by buying a PDF pattern to keep our free content coming

Kitty Dolly Crochet Pattern PDF Version

Unlock the full potential of your crafting journey with the Kitty Dolly Crochet Pattern PDF Version, offering convenience and accessibility for your crochet projects.
$9.99
$ 4
99 USD
One-time payment
  • Ad-free Experience: Enjoy a distraction-free crafting session with our PDF version, free from the clutter of advertisements commonly found on webpages.
  • Offline Access: Access your pattern anytime, anywhere, even without internet connection, allowing you to craft on-the-go without interruptions.
  • Printable Format: Easily print the pattern for quick reference or mark up your progress directly on the document, enhancing your crafting experience.
  • Lifetime Ownership: Secure your pattern for a one-time payment, ensuring lifetime access without worrying about subscription fees or recurring charges.
  • Dedicated Support: Receive personalized assistance from Amigurumilandia's support team for any access issues or pattern-related inquiries, ensuring a seamless crafting experience.
Popular
Luffy One Piece Crochet Pattern

Luffy

Free| Unlimited Access

Size: 24cm| Nivel: Medium

Free Naruto Crochet Pattern

Naruto

Free| Unlimited Access

Size: 18cm| Nivel: Medium

Angelica Pickles by Rugrats Free Crochet Pattern

Angelica Pickles

Free| Unlimited Access

Size: 20cm| Nivel: Basic

Tommy Pickles

Free| Unlimited Access

Size: 17cm| Nivel: Basic

Leave a Reply

Your email address will not be published. Required fields are marked *

Share your creations with us!

Send us pictures of your creations and we’ll provide you with our professional opinion!

We value your opinion

Send us a suggestion or comment to amigurumilandia1@gmail.com

© 2024 AmigurumiLandia

All rights reserved

error: The content of this page is protected