Welcome to the Daring Crochet Community! We’re thrilled to introduce our latest creation, the Nami One Piece Amigurumi Crochet Pattern, skillfully crafted by @amigurumisdavit. Standing tall at 23 cm, this amigurumi pays homage to the audacious navigator from the beloved Japanese manga series, “One Piece.” With a meticulously curated color palette including Beige, Orange, Blue, Black, Terracotta, Aquamarine, and Silver, crocheting Nami is an adventure in itself. From the beige hues accentuating her sun-kissed skin to the vibrant orange reflecting her fiery spirit, each stitch tells a tale of high-seas adventures. Nami, known for her indomitable spirit and navigational prowess, is a cherished character in the realm of anime and manga. As a core member of the Straw Hat Pirates, her determination and cunning make her an invaluable asset in their quest for the legendary One Piece treasure. With her iconic orange hair and signature blue and white attire, Nami’s presence on any crochet project brings a touch of excitement and adventure. Embark on your crochet journey with our free Nami One Piece Amigurumi Crochet Pattern and bring Nami to life stitch by stitch. This project not only offers a creative outlet but also serves as a homage to the rich tapestry of Japanese manga and anime culture. Whether you’re a seasoned crocheter or a novice, creating your own Nami amigurumi is a rewarding experience that celebrates the spirit of adventure and camaraderie.
Join the vibrant crochet community and set sail with her as your guide. Our step-by-step amigurumi pattern ensures that crocheters of all skill levels can embark on this exciting journey. Don’t miss out on the opportunity to crochet your very own Nami and add a dash of adventure to your amigurumi collection. Get started today and let your crochet hooks navigate the seas of creativity!
¡Let's get started!
Marterials
Yarn in the following colors: beige, orange, blue, black, terracotta, aqua green, and silver 2.0 or 2.5 mm crochet hook
Stuffing
Stitch marker
Tapestry needle
12 mm brown safety eyes
Silicone glue
Wire
Black embroidery thread
Universal glue
Abbreviations
sc– single crochet sl st– slip stitch ch– chain MR– magic ring inc– increase dec– decrease BLO– back loop only
The finished doll measures approximately 23cm and has an average completion time of 8 hours
Tips for crocheting Amigurumis 😉
🧵 Choose Quality Materials: The quality of your materials directly impacts the final result. Opt for soft and durable yarns, and needles that suit your knitting style. Remember, your amigurumis deserve the best!
📏 Know Your Gauge: Before diving into the project, take time to understand your knitting tension. Making a small test square will help you adjust the size and achieve a perfect amigurumi.
📖 Dive into the Pattern: Before you start knitting, carefully read through the entire pattern. Familiarize yourself with each step and make sure you understand all the instructions. This prior knowledge will make you feel more confident during the process.
📍 Use Stitch Markers: Marking the beginning of each round with a stitch marker is key. This not only helps you follow the pattern more easily but also prevents errors and confusion.
🌈 Explore with Colors: The color palette is your canvas! Don’t be afraid to experiment and play with unexpected combinations. Colorful amigurumis are more fun and expressive.
🧼 Block Your Creations with Care: After completing your amigurumi, blocking is essential. This process smooths out the details and defines the shape, giving a professional touch to your creations. Remember, crochet is more than a hobby; it’s an art form. Enjoy every stitch and create magic with your own hands! 💖✨ Happy knitting! 🌸🌟
Foot and Legs
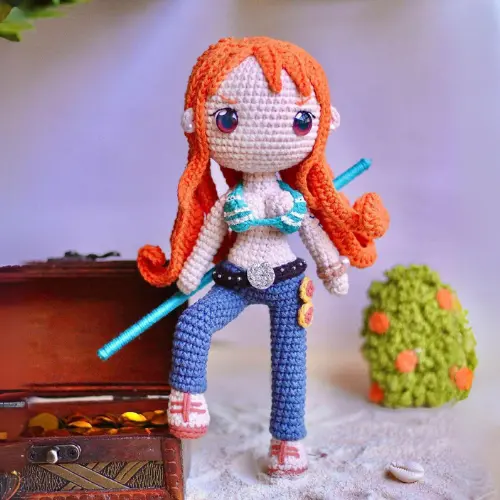
Start with terracotta yarn. Make 6 chains. Rnd 1:Working back into the second chain from hook, sc 4, 3 sc in the last chain, continue on the other side of the chain and sc 3, 2 inc (12) Rnd 2:1 inc, 3 sc, 3 inc, 3 sc, 2 inc (18)
Work a round of sc in BLO Switch to beige Rnd 3:BLO: 18 sc Rnd 4:18 sc Rnd 5:Sc 5, 4 dec, sc 5 (14) Rnd 6:Sc 5, 2 dec, sc 5 (12) Rnd 7-8:12 sc (2 rows) Rnd 9:Now let’s make 12 chains with sailor yarn. Join one end to the other forming a ring. Make 12 sc and now we’ll join this piece with the foot we’ve already made. Fit this piece on the leg and taking both strips of the pants’ hem and both strips of the foot make a row: Rnd 10-25:12 sc (16 rows) Make the two legs alike but in the second one, do not cut the yarn, we’ll go up through the body. Make another 6 sc in the second leg. Then go back with terracotta yarn on the feet and embroider the sandal.
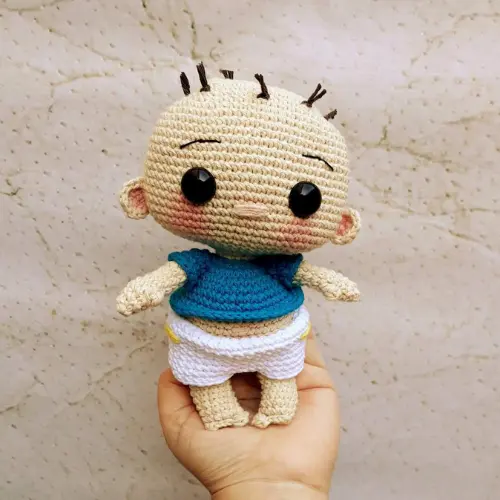
Image 1
Body
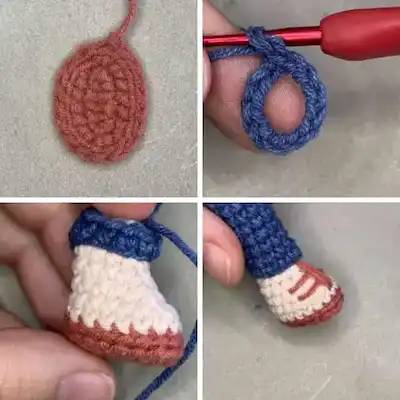
Starting from the second leg, make 3 chains and secure with 1 sc in the first leg, ensuring that the feet are facing forward. If needed, you can break or make more stitches. Rnd 26:Sc 11 on the way, 3 sc in the chain, sc 12 in the second leg, 3 sc in the chain (30) Rnd 27-30:30 sc (4 rounds)
Switch to beige Work a round of sc in BLO but do not count Rnd 31:BLO: 30 sc Rnd 32:(3 sc and 1 dec) repeat 6 times (24) Rnd 33:(2 sc and 1 dec) repeat 6 times (18) Rnd 34-38:18 sc (5 rounds) Rnd 39:(2 sc and 1 inc) repeat 6 times (24) Rnd 40-41:24 sc (2 rounds) Here you can insert wire or hot glue tube to secure the neck. Rnd 42:12 dec Rnd 43-50:12 sc (8 rounds) Rnd 51:6 dec Close with invincible MR and fasten off.
Image 2
Arms (make 2)
Start with beige yarn. Rnd 1:10 sc in MR Rnd 2-16:10 sc (15 rounds) Close the arm by decreasing stitches on both sides of the piece with 5 sc. Cut yarn leaving a tail for sewing. Sew the arms to round 42 of the body.
Breasts (make 2)
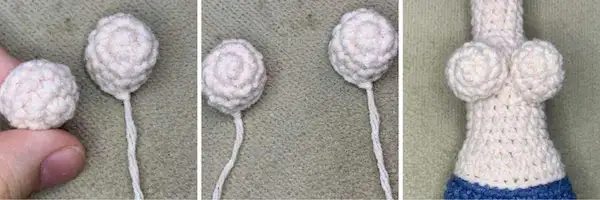
With beige yarn Rnd 1:6 sc in MR Rnd 2:6 inc (12) Rnd 3-4:12 sc (2 rounds) Cut yarn leaving a tail for sewing.
Image 3
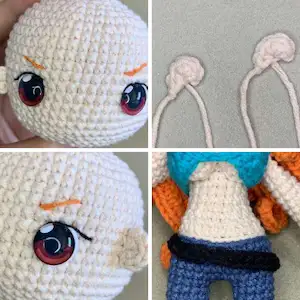
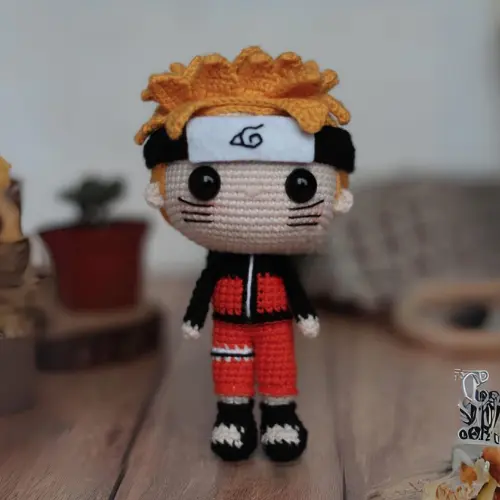
Head
With beige yarn Rnd 1:6 sc in MR Rnd 2:6 inc Rnd 3:(1 sc, 1 inc) repeat 6 times (18) Rnd 4:(2 sc, 1 inc) repeat 6 times (24) Rnd 5:(3 sc, 1 inc) repeat 6 times (30) Rnd 6:(4 sc, 1 inc) repeat 6 times (36) Rnd 7:(5 sc, 1 inc) repeat 6 times (42) Rnd 8:(6 sc, 1 inc) repeat 6 times (48) Rnd 9:(7 sc, 1 inc) repeat 6 times (54) Rnd 10-20:54 sc (11 rounds)
Place your eyes between rounds 15 and 16, with 8 stitches between them. Rnd 21:(7 sc, 1 dec) repeat 6 times (48) Rnd 22:(6 sc, 1 dec) repeat 6 times (42) Rnd 23:(5 sc, 1 dec) repeat 6 times (36) Rnd 24:(4 sc, 1 dec) repeat 6 times (30) Rnd 25:(3 sc, 1 dec) repeat 6 times (24) Rnd 26:(2 sc, 1 dec) repeat 6 times (18)
Stuff and make sure to leave the center of the head with a “hole” in the stuffing so we can push the neck through. Rnd 27:(1 sc, 1 dec) repeat 6 times (12) Rnd 28-35:12 sc (8 rows) Rnd 36:6 dec Close with invincible MR. Push the neck inward with the help of a needle or pen.
Image 4
Bikini
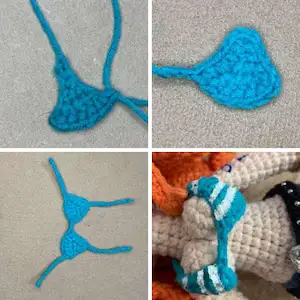
With aqua green yarn Chain 2 Rnd 1:Starting from the second chain from the hook, sc 1, ch 1 and turn (30) Rnd 2:1 inc, ch 1 and turn (2) Rnd 3:2 inc, ch 1 and turn (4) Rnd 4:1 inc, sc 2, 1 inc (6) Rnd 5:1 inc, sc 4, 1 inc (8) Make this part twice. At one end, make 15 chains. Also, make 15 chains at the top. Now at the other end, make 3 chains and join with the other part with 1 sc or tapestry needle. Paint the bikini with white paint.
I recommend painting the bikini when it is already on the body so that the paint does not “break” when putting it on.
Image 5
Ears (make 2)
With beige yarn Rnd 1:6 sc in MR Cut yarn leaving a tail for sewing. Sew the ears at eye level with 5 stitches of space between the eyes.
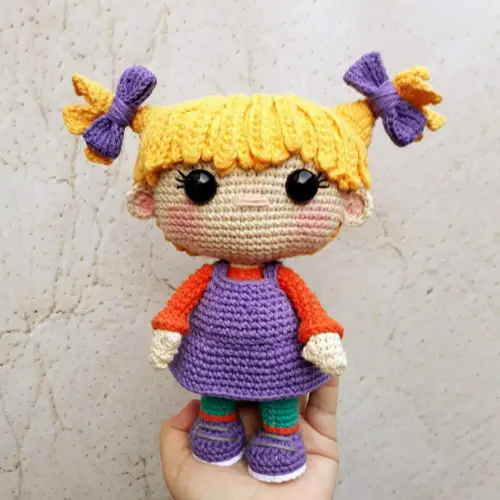
Belt
With black yarn Make 31 chains, return from the second base stitch making 30 sc, cut the yarn. Close the belt with a tapestry needle by joining one end with the other. Fit it onto the body. With aluminum wire, make 6 sc in the MR and close, glue it right in the center of the belt. I used some pebbles to decorate the entire belt.
Image 6
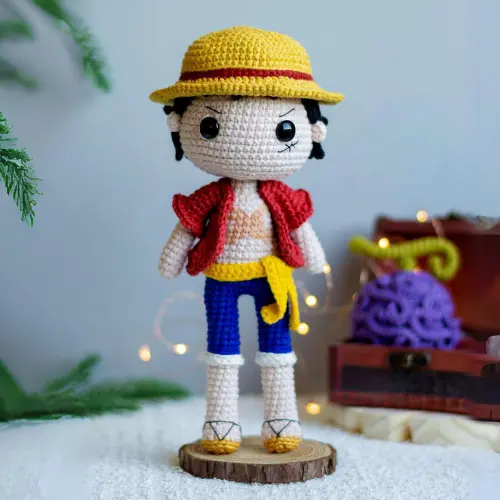
Hair
With orange yarn Rnd 1:6 sc in MR Rnd 2:6 inc Rnd 3:(1 sc, 1 inc) repeat 6 times (18) Rnd 4: (2 sc, 1 inc) repeat 6 times (24)
From here we will make the locks:
1.14: Chain 42, starting from the second chain, (1 hdc, 1 inc hdc) x 5, 31 hdc, secure in the next stitch with 1 sl st, and repeat this process until you have 12 threads;
15: Chain 26, from the second chain make 2 sc, 23 sc, secure the next one with 1 sl st;
16-19: Chain 9, from the second chain make 2 sc, 2 sc, 4 hdc and skip one stitch and secure in the next with 1 sl st;
20: Chain 26, from the second chain make 2 sc, 23 sc, secure the next one with 1 sl st;
Cut the yarn and tie off. Glue the hair to the doll’s head. Glue the bangs to the forehead
Image 7
Details
With the thinner orange yarn, embroider the eyebrows. Embroider the eyeliner and the white of the eyes.
With a piece of brown yarn, make two pieces of 6 sc in MR and fasten off. Then, work a round of sc in BLO with a little yellow on each piece and then glue it to the pants.
With a bit of beige tone, make 12 chains and place them on the arm, then glue a half pearl on top. With the same yarn, make a bracelet on top of the torso pose. Draw the tattoo and paint.
Image 8
Congratulations! You did it! The Nami pattern is complete. Thank you for your support! I hope you enjoyed crafting the Amigurumilandia's patterns.


