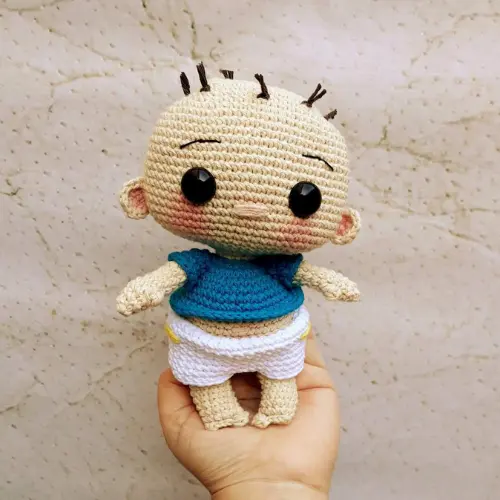
Designer: @azuliecroche
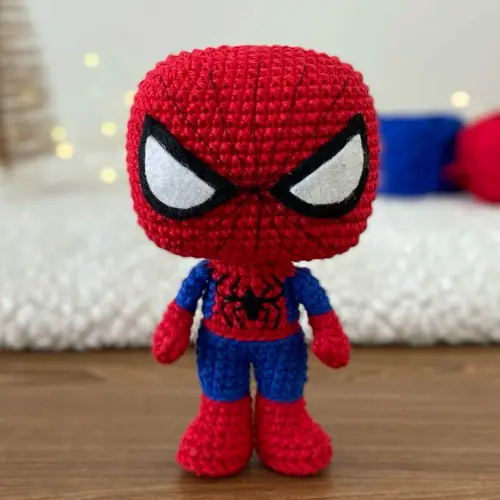
Welcome to Amigurumilandia, where you can create your very own Spiderman amigurumi with our Spiderman Amigurumi Crochet Pattern Free (Project made by: @azuliecroche). This delightful project stands at 14cm tall and perfectly captures the essence of the beloved superhero Peter Parker, who gained his extraordinary abilities from a radioactive spider bite. Known for his strength, agility, and iconic red and blue suit, Spiderman has been a staple in comic books, television series, and blockbuster movies, most recently portrayed by Tom Holland in the Marvel Cinematic Universe. This Easy and Fun DIY Project is designed for those with a medium skill level in crochet and uses red and blue yarn to bring Spiderman to life.
Our detailed Spiderman Crochet Pattern includes the iconic spider emblem on the chest and the distinctive mask with large white eyes outlined in black. This project is not just a toy but a piece of art, making it an excellent gift for kids, comic book enthusiasts, and anyone who appreciates handmade crafts. It’s perfect for birthdays, holidays, or any special occasion, offering a thoughtful and heartfelt present.
For those new to amigurumi or looking to expand their crochet skills, our comprehensive pattern instructions guide you through every step, ensuring a fun and rewarding experience. Whether you’re crafting this for yourself or as a gift, the Spiderman Amigurumi Crochet Pattern Free offers a unique and personal touch. Join our community of crochet enthusiasts, share your creations, and be inspired by others who love Spiderman as much as you do. Don’t miss out on this Easy and Fun DIY Project—start your Spiderman amigurumi today and enjoy the satisfaction of bringing this superhero to life with your own hands!
If you prefer, you can optionally acquire the ad-free, printable PDF version of this pattern, which includes additional support and helps us continue creating more wonderful patterns. Your purchase supports Amigurumilandia, ensuring we can keep providing high-quality crochet patterns for enthusiasts around the world. For more information and to find the PDF version, please click here 👈
¡Let's get started!
Marterials
- Amigurumi Yarn 3528 – RED
- Amigurumi Yarn 2829 – BLUE
- 2.0 mm crochet hook
- White and black felt
- Tapestry needle
- Sewing needle
- Scissors
- Stuffing
- Silicone glue
- Black skein
- Black sewing thread
Abbreviations
Ch: chain
MR: magic ring
St: stitch
Sc: single crochet
Sl st: slip stitch
Hdc: half double crochet
BLO: back loop only
Inc: increase
Dec: decrease
Tr-inc: triple increase
Approximate height of 14cm and an average of 4 hours.
Tips for crocheting Amigurumis 😉
- 🧵 Choose Quality Materials: The quality of your materials directly impacts the final result. Opt for soft and durable yarns, and needles that suit your knitting style. Remember, your amigurumis deserve the best!
- 📏 Know Your Gauge: Before diving into the project, take time to understand your knitting tension. Making a small test square will help you adjust the size and achieve a perfect amigurumi.
- 📖 Dive into the Pattern: Before you start knitting, carefully read through the entire pattern. Familiarize yourself with each step and make sure you understand all the instructions. This prior knowledge will make you feel more confident during the process.
- 📍 Use Stitch Markers: Marking the beginning of each round with a stitch marker is key. This not only helps you follow the pattern more easily but also prevents errors and confusion.
- 🌈 Explore with Colors: The color palette is your canvas! Don’t be afraid to experiment and play with unexpected combinations. Colorful amigurumis are more fun and expressive.
- 🧼 Block Your Creations with Care: After completing your amigurumi, blocking is essential. This process smooths out the details and defines the shape, giving a professional touch to your creations. Remember, crochet is more than a hobby; it’s an art form. Enjoy every stitch and create magic with your own hands! 💖✨ Happy knitting! 🌸🌟
How to make the head articulated and attached to the neck?
✅With the needle and a piece of thread matching the head color, insert it into the top of the head and pull it out through the tiny hole in the neck – First image of box 1.
✅Pass the needle through the neck in row 27 from side to side 2 times – Second image of box 1.
✅Reinsert the needle through the neck hole and bring it up to the top of the head, at the same point where you inserted the needle – Third image of box 1.
✅Pull tightly, make a knot, and finish off by hiding the thread – Fourth image of box 1.

Head
With Red Yarn:
Rnd 1: 8 single crochet in magic ring (8)
Rnd 2: Increase in each stitch around (16)
Rnd 3: (2 increases, 2 single crochet) repeat 4 times (24)
Rnd 4: 1 single crochet, 2 increases, (4 single crochet, 2 increases) repeat 3 times, 3 single crochet (32)
Rnd 5: 2 single crochet, 2 increases, (6 single crochet, 2 increases) repeat 3 times, 4 single crochet (40)
Rnd 6: 3 single crochet, 2 increases, (8 single crochet, 2 increases) repeat 3 times, 5 single crochet (48)
Rnd 7: 4 single crochet, 2 increases, (10 single crochet, 2 increases) repeat 3 times, 6 single crochet (56)
Rnd 8: 5 single crochet, 2 increases, (12 single crochet, 2 increases) repeat 3 times, 7 single crochet (64)
Rnd 9-22: 64 single crochet (64) – 14 rounds
Rnd 23: 7 single crochet, 2 decreases, (12 single crochet, 2 decreases) repeat 3 times, 5 single crochet (56)
Rnd 24: 6 single crochet, 2 decreases, (10 single crochet, 2 decreases) repeat 3 times, 4 single crochet (48)
Rnd 25: 5 single crochet, 2 decreases, (8 single crochet, 2 decreases) repeat 3 times, 3 single crochet (40)
Rnd 26: 4 single crochet, 2 decreases, (6 single crochet, 2 decreases) repeat 3 times, 2 single crochet (32)
Stuff the head. Pay attention to the corners to maintain the square shape of the head.
Rnd 27: 3 single crochet, 2 decreases, (4 single crochet, 2 decreases) repeat 3 times, 1 single crochet (24)
Rnd 28: (2 decreases, 2 single crochet) repeat 4 times (16)
Rnd 29-31: 16 single crochet (16) – 3 rounds
Rnd 32: (2 single crochet, decrease) repeat 4 times (12)
Finish with a slip stitch. Cut and secure the yarn. Insert this tube into the head as shown in photo 2.

Arms (make 2)
With Red Yarn:
Rnd 1: 7 single crochet in magic ring (7)
Rnd 2-3: 7 single crochet (7) – 2 rounds
Rnd 4: 3 single crochet, 1 bobble stitch, 3 single crochet (7)
Rnd 5: 7 single crochet (7) – 1 round
Switch to blue yarn.
Make 7 single crochet in the back loop only of each stitch and do not count this round.
Rnd 6: 7 single crochet in the back loop only (7)
Rnd 7-8: 7 single crochet (7) – 2 rounds
Place a bit of stuffing into the red part and close with 3 single crochet, then fasten off.
Feet and Legs
With Red Yarn:
1st LEG:
Rnd 1: 6 chains, skip the first chain: 4 single crochet, triple increase, 3 single crochet, increase (12)
Rnd 2: Increase, 3 single crochet, increase 3 times, 3 single crochet, increase 2 times (18)
Rnd 3: 18 single crochet in the back loop only (18)
Rnd 4: 18 single crochet (18)
Rnd 5: 7 single crochet, 2 decreases, 7 single crochet (16)
Rnd 6: 4 single crochet, 4 decreases, 4 single crochet (12)
Rnd 7-8: 12 single crochet (12) – 2 rounds
Switch to blue yarn.
Make 12 single crochet in the back loop only and do not count this round.
Rnd 9: 12 single crochet in the back loop only (12)
Rnd 10-11: 12 single crochet (12) – 2 rounds
Repeat the process on the 2nd leg, make 3 more single crochet, and join with 1 single crochet in the 1st leg. When joining, make sure the feet are facing downwards, this way, the color change will be on the back of the amigurumi. Stuff as you crochet.
Rnd 12: 23 single crochet (plus the single crochet that joined the legs) (24)
Rnd 13-14: 24 single crochet (24) – 2 rounds

Body
Switch to red color.
Make 12 single crochet in the back loop only and do not count this round.
We will work color changes in red and blue identified by the change in font color.
Rnd 15: 24 single crochet in the back loop only.
Rnd 16-17: 3 single crochet, 6 single crochet, 7 single crochet, 6 single crochet, 2 single crochet (24) – 2 rounds
Rnd 18: decrease, single crochet, 6 single crochet, decrease, 5 single crochet, 2 single crochet, decrease, 2 single crochet, 2 single crochet (21)
Rnd 19: 2 single crochet, 6 single crochet, 6 single crochet, 5 single crochet, 2 single crochet (21)
In red only
Rnd 20: 5 single crochet, 3 single crochet joining the arm, 7 single crochet, 3 single crochet joining the other arm, 3 single crochet (21)
Rnd 21: (5 single crochet, decrease) 3 times (18)
Rnd 22: (1 single crochet, decrease) 6 times (12)
Rnd 23-27: 12 single crochet – 5 rounds
Rnd 28: Decrease (6)
Cut and fasten off the yarn.


Spider Embroidery
Using black yarn, embroider the spider between rows 16 and 20 according to the photos above.
Tip: Insert the tapestry needle into the back of the body and bring it forward to make the first leg of the spider, then continue passing the yarn alongside the single crochet stitches, and when finished, pass the needle back through the same point it entered, make a knot, and hide the yarn.

Spider Web on the Head
Find the center of the head between rows 17 and 18, mark this point with a pin, and with a sewing needle and black thread, cross back and forth to form the spider web (only on the front part of the head).
Tip: Leave approximately a 4 single crochet stitch distance between the threads.

Eyes (make 2)
Cut 2 pieces of black felt.
Measurements: 3.5 cm x 2 cm (see photo 8) (always cut a little less, never more, okay?)
Cut 2 pieces of white felt.
Measurements: 2.4 cm x 1.2 cm (see photo 8)
First, glue the white part of the eyes onto the black part. Then, pin them between rows 12 and 19, with a distance of 2 single crochet stitches at the bottom of the eyes and 15 single crochet stitches at the top, and glue. Articulate the head as explained at the beginning of the pattern.

Congratulations! You did it! The Sonic Doll Crochet Pattern is complete. Thank you for your support! I hope you enjoyed crafting the Amigurumilandia's patterns.
Support us by buying a PDF pattern to keep our free content coming

Spiderman Crochet Pattern PDF Version
Unlock the full potential of your crafting journey with the Spiderman Crochet Pattern PDF Version, offering convenience and accessibility for your crochet projects.-
Ad-free Experience: Enjoy a distraction-free crafting session with our PDF version, free from the clutter of advertisements commonly found on webpages.
-
Offline Access: Access your pattern anytime, anywhere, even without internet connection, allowing you to craft on-the-go without interruptions.
-
Printable Format: Easily print the pattern for quick reference or mark up your progress directly on the document, enhancing your crafting experience.
-
Lifetime Ownership: Secure your pattern for a one-time payment, ensuring lifetime access without worrying about subscription fees or recurring charges.
-
Dedicated Support: Receive personalized assistance from Amigurumilandia's support team for any access issues or pattern-related inquiries, ensuring a seamless crafting experience.
This might interest you
Share your creations with us!
Send us pictures of your creations and we’ll provide you with our professional opinion!
We value your opinion
Send us a suggestion or comment to amigurumilandia1@gmail.com
© 2024 AmigurumiLandia
All rights reserved

